Big Walk Puzzle Solutions & Guide
Last verified: August 13, 2026 · Updated with the Blue Tower & trains, Black Tower & the black sphere's interior co-op rooms, and the island's independent side puzzles.
Big Walk is, at its core, a giant handcrafted escape room. The island is packed with machines, locks, vices and gates — but almost none of them test your reflexes. They test your communication. No puzzle in the game has an official name, so players have made up their own — microphone puzzle, pegboard puzzle, the number puzzle. This guide documents every named puzzle we've verified so far, where to find it, and the approach that cracks it fastest.
Big Walk's puzzles don't have official names or a built-in checklist, so we've organized them the way most players actually play: grouped by the tower they unlock, in the order you'll reach them (Drawbridge → Red → Green → Blue → Yellow → Black). The puzzles listed "near" each tower are the most convenient ones for its key — in practice, any solved puzzle on the island contributes a piece to whichever tower you're feeding, so don't stress about doing exactly these. The independent puzzles further down can be solved any time.
Find a Puzzle by Name
Searching for a puzzle you've heard other players talk about? Here's the name-to-puzzle map. Each entry tells you what the puzzle actually is, where it sits on the island, and jumps straight to the solution.
| What players call it | What it actually is | Jump to |
|---|---|---|
| Microphone puzzle (chair / direction puzzle) | Six microphones and a headphone chair west of the Yellow Tower | Microphone puzzle |
| Peg / pegboard / pin puzzle | The Blue Room pattern-recreation puzzle at the start | Blue Room pegboard |
| Green structure puzzle | Simultaneous switches around the starting columns | Green Structure |
| Mechanical arm puzzle | Stacking up to reach the gourd on the arm | Mechanical Arm |
| Telescope puzzle | A gourd in a sealed box, opened with a telescope button | Cave & telescope |
| Number puzzle (4166, 1899) | A coordinate hunt for a hidden button | The 4166, 1899 puzzle |
| Green room puzzle | Symbol call-out — locked player describes, outside presses | Green Room |
| Yellow maze puzzle | Timer hand-off through the maze to the green pot | Yellow Maze |
| Mountain gesture puzzle | Telescopes and charades across five platforms | Mountain Gesture |
| Golf ball puzzle | The strangely heavy red ball relay | Golf ball puzzle |
| Light / bulb puzzle | Throwing light bulbs through basketball hoops | Basketball court |
| Counting puzzle | Faces flashing across a ring of monitors | Blue signal counting |
| Beach house puzzle | Count the heads, tile the number, telescope it across | Beach house |
| Yellow stand puzzle | Only green stands count — fill the meter | Yellow stands |
| Orange barn puzzle | Sealed player guides gestures through the barrier | Orange Barn |
| Turnstile house puzzle | Describe five symbols, place matching pieces (Blue Tower) | Turnstile House |
| Timer room / five-minute room | Lock the room, wait out the countdown (Blue Tower) | Locked Room / Timer |
| Obstacle course puzzle | Leapfrog and platforming with a timer throw (Blue Tower) | Obstacle Course |
| Blindfolded obstacle course | Golden head blocks vision — partner leads the way | Blindfolded Obstacle |
| Charades locked room | Act out arm movements, match the poses | Charades Room |
| Easter egg hunt puzzle | Gather 36 wooden pieces across the arena (Yellow Tower) | Easter Egg Hunt |
| Music room puzzle | Recreate speaker sounds to hang the right ones (Yellow Tower) | Music Room |
| Stage directions puzzle | Inverted light positions, arm-signal the button (Yellow Tower) | Stage Directions |
| Aerial seat puzzle | Crescent-moon chair on a track — ferry the pieces | Aerial Seat |
| Button room puzzle | Describe the lit light across the gap (Yellow Tower) | Button Room |
| Black Tower symbol room | Silent symbol signalling with gestures (voice blocked) | Symbol Room |
| Black Tower green room | Red-light answers through the blackboard (voice blocked) | Green Room Red Light |
| Double green barn | Recreate pose sequences without voice | Double Green Barn |
| Golden mask race | Masked player guided through the obstacle run | Golden Mask Race |
| Chairlift shape sequence | Ferry shapes across and match the display | Chairlift Shapes |
| Deep well puzzle | Throw the collectible up level by level | Deep Well |
| Black sphere — Symbols on the Wall | Read the symbol board, call out the placement order | Symbols on the Wall |
| Black sphere — Blue Totems | Match the glowing totem symbols to switches | Blue Totems |
| Black sphere — Tomato Timer | Kick the tomato timer back and forth before time runs out | Tomato Timer |
| Black sphere — Race Track | Run together and press the two switches at once | Race Track |
| Black sphere — Red Kettle & Switches | Glowing buttons guide the switch player; the kettle signals | Red Kettle & Switches |
| Black sphere — Hidden Symbols | Viewfinder symbol cards, placed through the window | Hidden Symbols |
| Black sphere — Shapes & Switches | Gesture the glowing shapes through the window to the switch player | Shapes & Switches |
| Button puzzle | Usually the hidden button of the 4166, 1899 puzzle | The 4166, 1899 puzzle |
| Camera puzzle | Most likely the black sphere's viewfinder symbol room — community names vary (also the beach-house telescope and monitor counting) | Camera puzzle guide |
| Lost an item | Check the Lost & Found before retracing your steps | Lost & Found |
| Purple Gourds puzzles | Seven post-game puzzles unlocked after the true ending | Purple Gourds puzzles |
| Red coordinates puzzle (3259, 1883 / 3231, 1976) | Two-button coordinate hunt — numbers change as you walk | Red Coordinates |
| Green flare puzzle | Flare points to a hidden box under rocks by the waterfront | Green Flare |
| Seaside counting puzzle | Count flashing faces, launch the board, read it by telescope | Seaside Counting |
| Blue slope music puzzle | Fetch four music blocks from across the island | Blue Slope Music |
| Dome microphone puzzle | Red-and-white dome — hear the active mic, wave to signal | Dome Microphone |
| Green seat speaker mic | Chair + hidden radio station — one player takes a long walk | Green Seat Mic |
| Radio stations | Seven broadcast points — find and activate them all | Radio Stations |
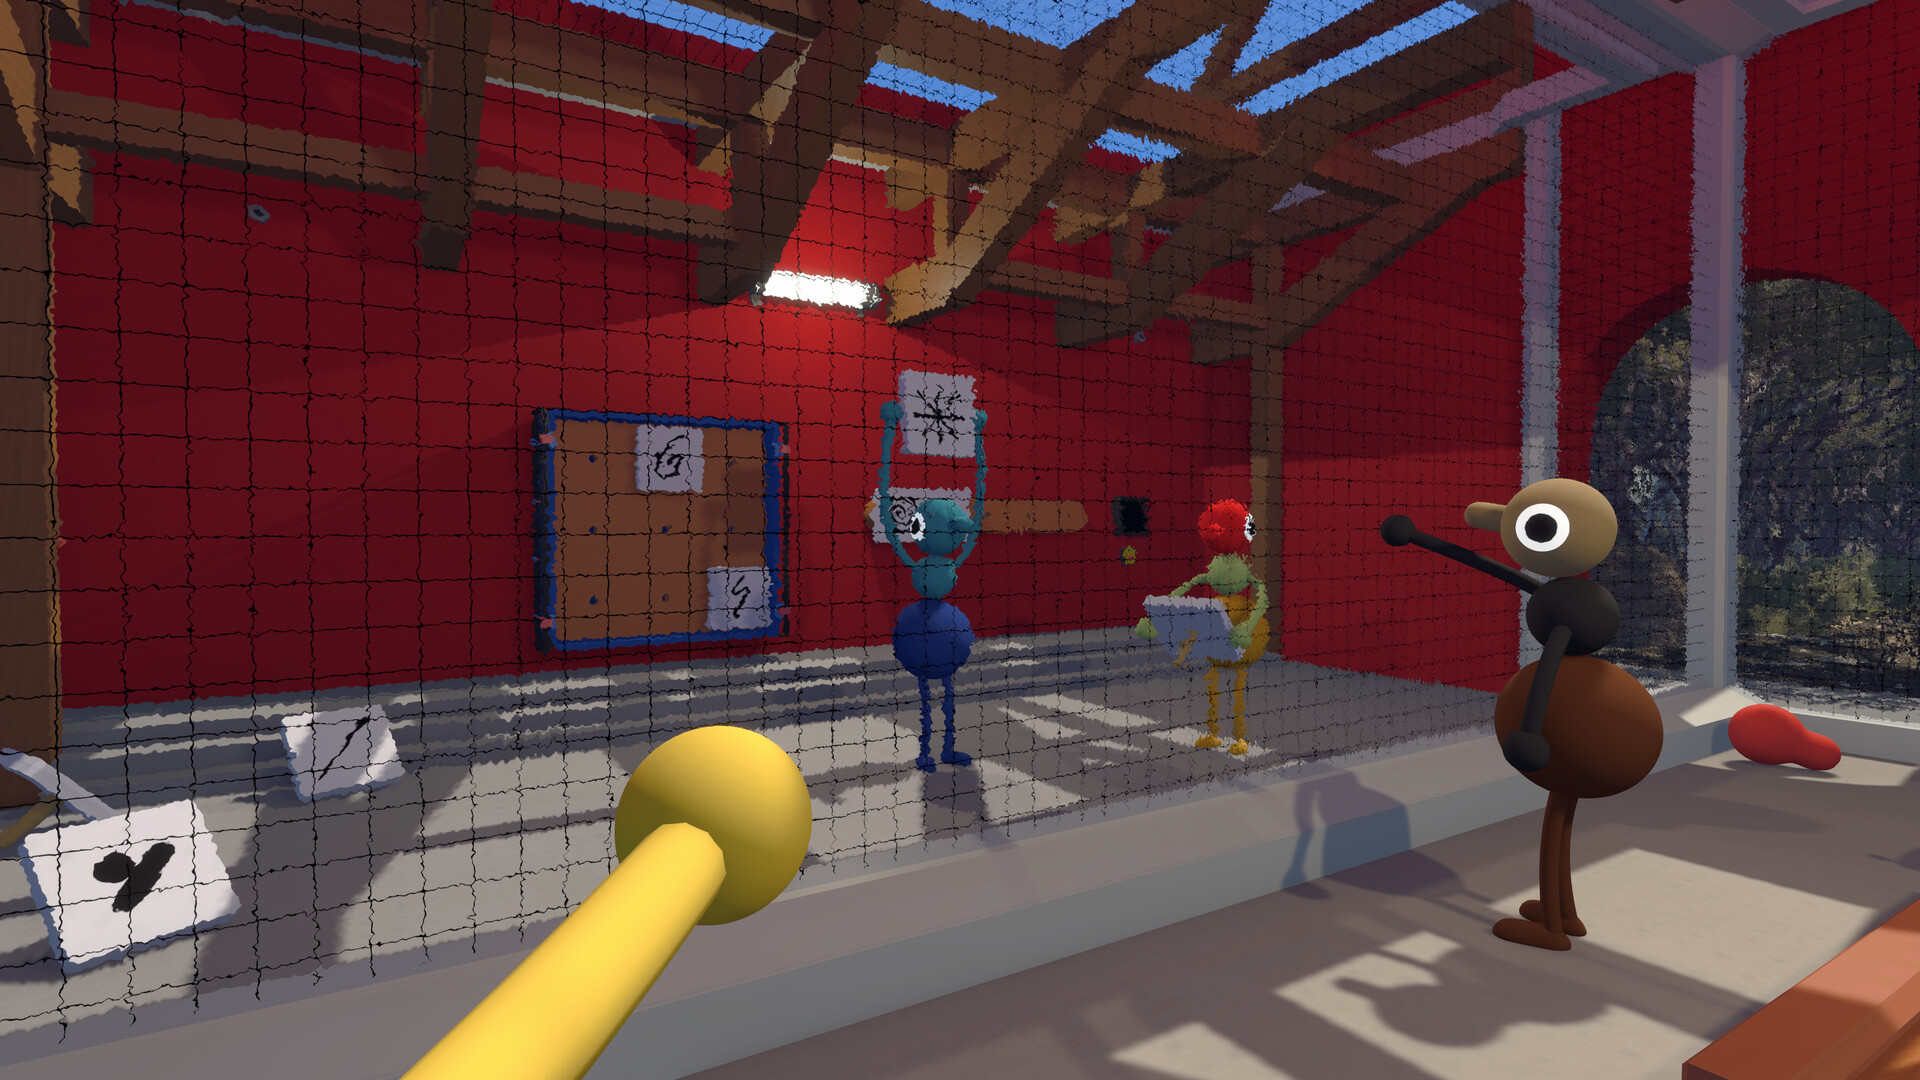
Every structure on the island is a puzzle station waiting for a group.
How Puzzles Work in Big Walk
Big Walk's puzzles share a consistent visual language — obvious buttons, slots and panels, no quest markers. Two rules apply almost everywhere: read the machine before touching it (most solutions are visible from the structure itself), and assign roles out loud ("you hold, I go" beats five players pressing the same button).
The island's big picture: the opening drawbridge leads to five colored towers — Red, Green, Blue, Yellow and Black. Each tower runs on the same rhythm: solve its nearby puzzles, place the rewards in the roof slots, cut the key that appears, and the tower's reward unlocks (a map room, a chairlift, the trains, a tunnel, the final sphere).
Machines are the island's language.
The Drawbridge: Opening the Island
The first gate of the game. Four small puzzles around the starting area each hide one gourd-shaped collectible (the same objects some groups call "pears" or "eggy things"). Place all four in the slots at the bridge, grab the key that appears, run it through five key cutters — three north of the spot, two on the beach — and the drawbridge lowers. There's no fixed order; these four work in any sequence.
Blue Room (the "peg / pin puzzle")
Where: a small blue house left of the starting path — hug the left edge as you leave the tutorial grounds.
How it works: one player steps inside and gets sealed in. The sealed player sees a pattern displayed in a row. The player outside has a pegboard of tiles (or wall panels, depending on how your group describes it) and must recreate the pattern from their partner's spoken description.
Solution: describe shapes top-to-bottom with agreed names — "three circles stacked", "the asterisk", "S-shape" — and have the outside player place tiles to match. Press the switch to the right when done. Correct = confetti and the gourd drops from the clamp. Wrong = try again with better names. For the full deep-dive — shape naming, 3-4 player tactics and every mistake to avoid — see the Blue Room peg puzzle guide.
Green Structure (simultaneous switches)
Where: left side of the starting map, in the green structure with columns.
How it works: switches sit on the columns around the structure, and they only work if every switch is pressed at the same moment.
Solution: one player per switch, plus one caller who isn't touching anything. The caller counts down — "three, two, one, now!" — and everyone presses together. With more players than switches, leave the spares on the ground cheering. The gourd unlocks when all are held.
Mechanical Arm (the stacking puzzle)
Where: an L-shaped yellow structure near the bottom of the starting path.
How it works: the gourd hangs off the top of the arm, out of reach, with a switch just below it that's also too high to reach alone.
Solution: stack up. One player crouches, a friend climbs onto their shoulders, and the top player activates the switch. Two players is enough; three makes it trivial. If you haven't practiced carrying yet, this is where it pays off.
Cave & Telescope (the "telescope puzzle")
Where: a sealed box among the rocks, near the starting area; the telescope that controls it is on the right side of the map.
How it works: the box stays shut until someone activates it — and the switch is far enough away that you can't both activate and collect.
Solution: one player stays at the telescope and presses the switch; a red light marks the box's location, and it opens while the button is held. A second player walks to the box and grabs the gourd while it's open. Keep holding until they're clear — release too early and the box closes on the run. For the full breakdown — timing, 3-4 player layout and the reward chain — see the telescope puzzle guide.
Drop the gourds into the bridge's four slots and the key appears. Cut it at all five key cutters — three north of the bridge spot, two on the beach — following the arrow each cutter reveals. The finished key opens the drawbridge. On the far side you'll also spot a blue doorway with a key cutter and a locked door: that's the map room, which needs the Red Tower's key.
Red Tower: Five Challenges
Past the drawbridge, the path up the hill (marked by a red key cutter) leads to the Red Tower. Five challenges around it each hide a collectible; place all five in the roof slots, cut the key, and it opens the map room back by the spawn — a huge 3D island map plus a paper map with coordinates. That room is the key to half the puzzles left on the island. The five challenges:
Green Room (symbol call-out)
One player gets locked in the green room with a terminal. The terminal displays symbols; the player outside presses the matching symbols on their side. Same skill as the Blue Room — precise names beat vague descriptions. Correct sequence unlocks the collectible.
Yellow Maze (the timer hand-off)
Two paths split around a maze. One player goes left, another goes right. A timer appears on one side and must be handed over and placed on a green pot on the other side before it runs out. Roles: grabber, runner, and a voice on the pot side calling directions.
Train Station Cannon & the Basketball Court
Two quick ones near the Red Tower:
- Cannon: one player activates the cannon, which fires a timer across the station. Another player chases it down and throws it to a partner waiting on the platform, who places it on the green pot. It's a throwing puzzle disguised as a fetch quest.
- Basketball court (the "light / bulb puzzle"): the easiest challenge on the tower. Both players pick up light bulbs and throw them through the baskets until all the court's lights turn green. No timing, no coordination — just aim.
Mountain Gesture (telescopes & charades)
One player stays at the overlook point and scans five platforms through the telescopes. A partner treks to each platform and must perform the gesture shown there — arms and body only, and a binocular helps to see clearly. The player at the overlook picks the gesture card that matches what they see. It's the game's purest charades test, and the collectible drops when all five match.
Green Tower & the Chairlift
The chairlift is one of the island's best shortcuts — it links the Green Tower region toward the Blue, Yellow and Black Tower areas. The station sits right next to the Green Tower (a blue structure with a red floor and an empty key slot). The rhythm is the same as everywhere: solve five puzzles, place five rewards in the tower's roof slots, grab the key that appears on the back of the panel, run it through all five key cutters (follow the arrow each one reveals), and insert the finished key at the chairlift canopy. The chairs start moving — and the "Big Sit" achievement pops. Five puzzles cluster close to the Green Tower:
Orange Barn Puzzle (near the railway track)
This one needs exactly two players. Press the buttons next to the two doorways — the collectible unlocks, but it also seals one player inside the room. The trapped player finds a hidden switch on one of the pillars, which reveals a tile pattern that must be recreated on a pegboard. Here's the catch: the barrier blocks voice and text chat completely, so the trapped player guides with hand gestures, facial expressions and tapping on the barrier. The free player places tiles until the sequence lines up and the barrier lifts. For the full solve — gesture vocabulary, step-by-step and the mistakes that stall the run — see the orange puzzle guide.
Blue Signal Counting (the "counting / face puzzle")
Activate the switch at the entrance. A random number of faces flashes across the blue signals and monitors. The whole group's job is simple and surprisingly hard: count every image that appears, and only that. Enter the count to unlock the collectible. Watch carefully — the flashes are quick and the numbers change each attempt.
Yellow Stands (the meter puzzle)
On the way up to the Green Tower you pass a circular blue arena full of yellow stands, with a switch beside the locked collectible. Look through the glass on each stand: only the ones showing a green glowing item are correct. Activate the correct stands to fill the center meter to 100 percent — hitting any stand with a red bulb resets your progress, so press the reset switch beside the collectible and start over. The correct stands don't follow a pattern, so mark the wrong ones with carried items (or just remember them) between attempts.
Beach House (count the heads)
Past the Green Tower toward the beach sit two beach houses, and you need a player in each. In the first house, activate the mechanism next to the collectible on the ground floor — it displays a number of head images. Run upstairs to the tiles and build that number: each tile has a value (triangle = 10, asterisk = 5, single line = 1), so combine tiles to match the total. If 20 heads appeared, place two triangle tiles. Press the button and the display board rises so the other house can read it. The player in the second house reads the board through a telescope and enters the number — a correct entry unlocks the final collectible. No telescope? A walkie-talkie works, but you'll need to describe the digits.
The 4166, 1899 Puzzle (the "number puzzle")
Where: a box with a red gourd inside, near the beach, with a sign reading 4166 and 1899. You'll likely find it before you can solve it — that's normal.
What it is: the numbers are map coordinates. 4166 is the X-axis (longitude), 1899 is the Y-axis (latitude). The gourd's box only opens while someone holds a hidden button at those coordinates.
Solution:
- Unlock the map room first by completing the Red Tower. The paper map inside has latitude and longitude marked along its edges — the 3D floor map shows every puzzle but no coordinates, so the paper map is the one you want.
- Find coordinates (4166, 1899): south-central part of the island, between where the railway curves and the ski lift disappears into a tunnel.
- Find the button: it's on the side of a conjoined rock on a hill, south of a puzzle inside a green ring where faces flash across monitors (the counting puzzle). It's deliberately camouflaged — get as high up the hill as you can and look back down at the rocks.
- Hold the button while a partner back at the box grabs the gourd. The box stays open only as long as the button is pressed, so keep a walkie-talkie pair between holder and grabber.
Optional shortcut: a GPS device — a light blue box showing your current latitude on top and longitude below — sits southeast of the Green Tower beside the ski lift station. One player can carry it to the button location and walk the coordinates in directly, no map required.
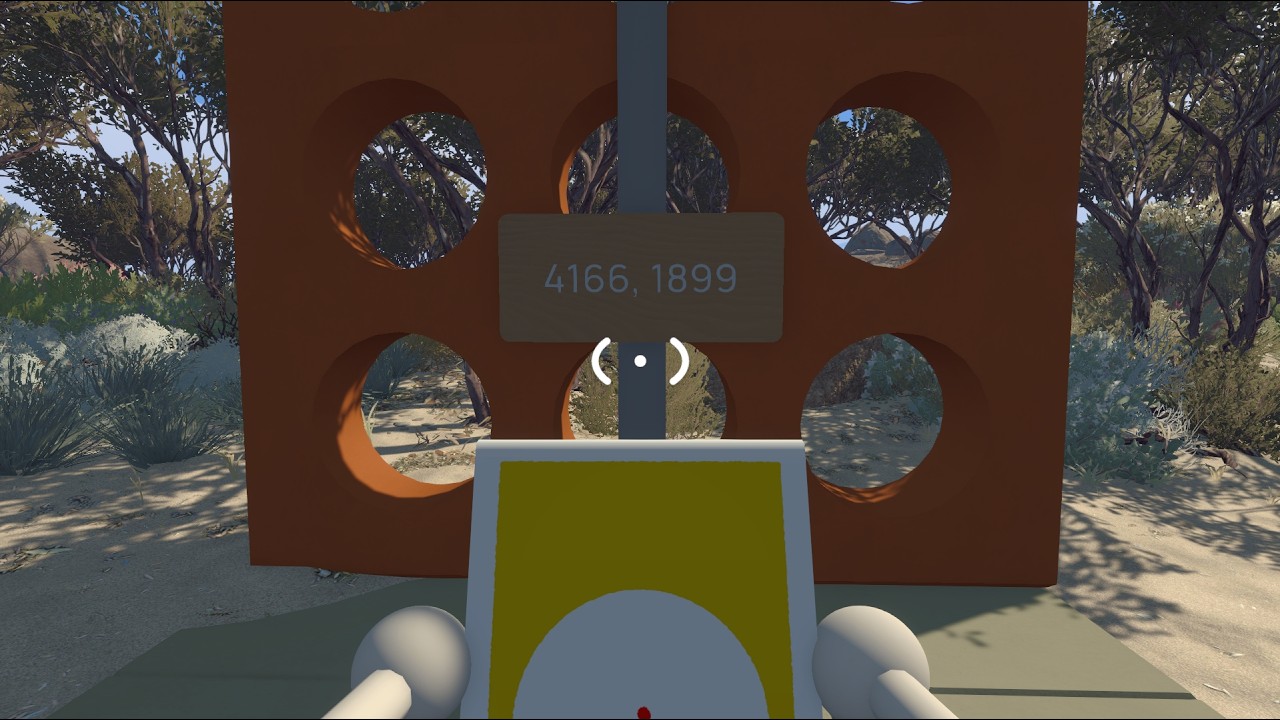
4166, 1899 — map coordinates hiding a button and a red gourd.
Blue Tower & the Trains
The Blue Tower sits at map coordinates 3540, 1850 — the tall blue lighthouse on the mountain, easiest to spot from the beach. Its reward is the train network: restore it and three trains (red, green and yellow) start looping the island's railway, which becomes the fastest way across the map. The chain follows the same rhythm as every tower: place five control-panel pieces in the five dials on the Blue Tower's roof and the tower key unlocks at the top. As with every tower, the pieces come from any solved puzzles — the five below are simply the closest documented set to the Blue Tower.
Turnstile House (3505, 1960)
A red building with a pair of yellow turnstile gates, easy to spot from the Blue Tower. Each player enters through one turnstile — you'll drop any carried items at the gate, so pick them up again on the way through. The player on the right sees five symbols visible only to them; the player on the left has nine puzzle pieces and a plank to display five next to a black screen. The right-side player describes the five symbols left to right, and the left-side player places the matching pieces on the panel. Communicate through the wall, around the rear turnstile exit, or with walkie-talkies — the tile patterns are randomized every session, so you can't memorise this one. Press the button below the black screen when the pattern matches, and the control panel piece unlocks in the right-hand room.
Locked Room / Five-Minute Countdown (3590, 2020)
A red house on the mountainside (base of the mountain, right of the Turnstile House, visible from the beach) with a large black countdown clock inside. Everyone goes inside and presses the two buttons to lock the room — then you wait out the full five minutes. Nothing else to do, no hidden switch: the control panel piece unlocks automatically when the countdown hits zero. It's the same patience test as the post-game purple version of this room, which runs a full 30 minutes — see Purple Gourds puzzle #1.
Obstacle Course (3700, 1950)
A leapfrog-and-platforming course — easy to spot in daylight, but starting it is the confusing part. One player hops onto another's shoulders to jump over the wall and open the door from the other side; a player presses and holds the button to keep the door open while their friend jumps through to be caught. Keep leap-frogging up the big block stairs, crouch under the low wall, and cross the red planks to the final area, where both players press the two switches at the same time to open the door. One player drops off the platform, runs up the red stairs and waits on the far side; the player still on the platform grabs the tomato-shaped timer from the holder on the left and throws it across. The waiting player places it in the holder — and the piece is yours.
Blindfolded Obstacle Course (3360, 1930)
The trust-fall puzzle. A golden head sits on a pedestal outside the turnstile gate — put it on and you see only blurry colours with no sense of direction. A player outside verbally leads the masked player through the course: short, single instructions ("turn right, keep going, stop", "walk forward, jump while moving, crouch"), describing what's ahead as well as how to clear it. Follow the wall from outside and talk through the gaps — you only need to switch sides twice. The masked player reaches and presses the red button on the far side to unlock the control panel piece.
Charades Locked Room (3250, 1940)
The same locked-room setup as the other towers, but the puzzle pieces show arm movements and actions instead of symbols — and unlike the symbol puzzles, the patterns here are static, so you can retry as many times as you like. Lock the room and activate the puzzle; the player in the right-hand room acts out each action beside the glass window near the entrance, and the others choose the puzzle piece that matches each pose, in order. Correct sequence unlocks the control panel piece.
The Train Activation Chain
With five pieces in the roof dials, grab the Blue Tower key and run it through the five key cutters in sequence — each cutter shapes the key and its machine-top arrow points to the next: by the tower's front door, along the mountain edge (twice), midway down the mountain path, and at the bottom of the path. Insert the finished key at the main train station (3380, 1740), northwest of the Blue Tower and tucked into the mountainside. All three trains — red, green and yellow — start looping the track in the same direction; the red train ahead of the station moves first. Each train can be paused with the lever inside its first carriage (pull and hold to stop). Boarding a moving train earns the "Big Ride" achievement — and once the network is running, the railway curve becomes a fast lane for every coordinate puzzle on the island.
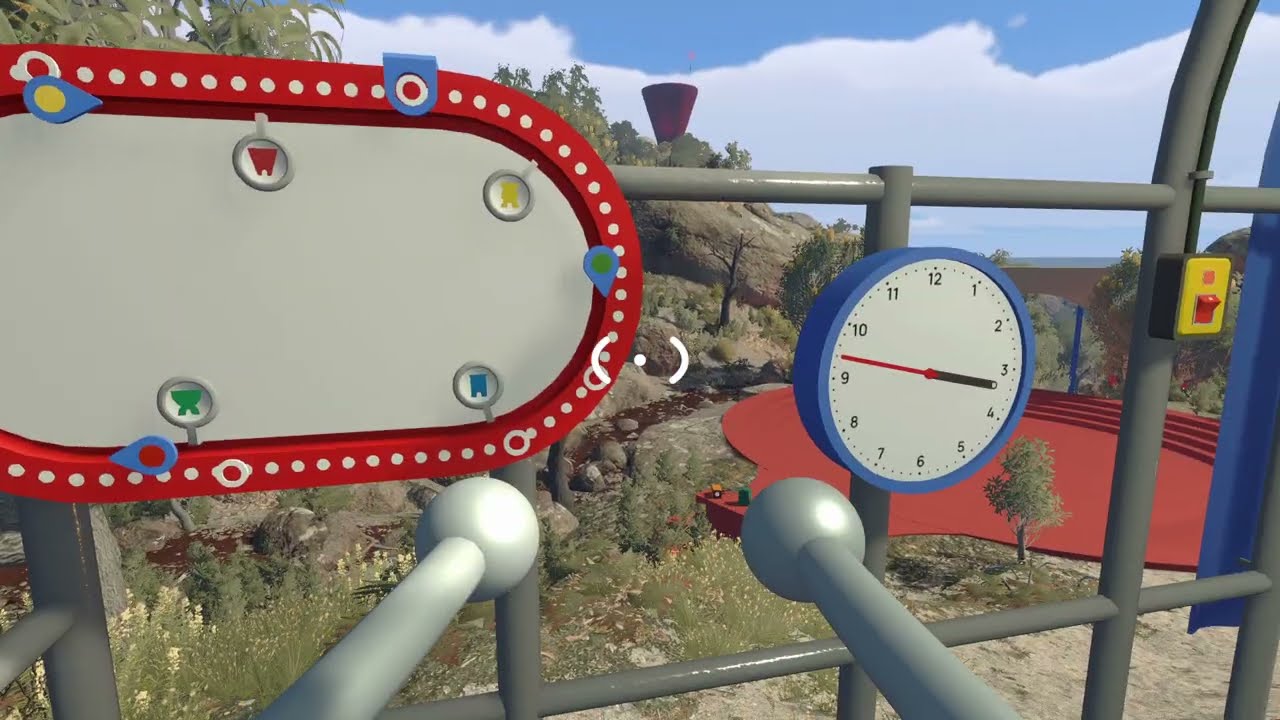
Restore the Blue Tower's key and the island's trains start moving.
Yellow Tower & the Tunnels
The Yellow Tower is the fourth tower in the sequence (after Red, Green and Blue) and its puzzles are the meanest yet. Same rhythm: five puzzles, five red control-panel pieces placed on the roof, key appears, five key cutters (each arrow points to the next — one on a cliff, one on a boulder, one facing the Black Tower, and the last near the tunnel entrance). The finished key opens the Yellow Tunnel at map coordinates 3500, 1620, southeast of the Yellow Tower (3310, 1560). Past the tunnel wait a secret area and the final radio channel — if you're this far, the end is in sight.
The island's final tower, Black, sits beyond — see the Black Tower & the Black Sphere section below.
The Microphone Puzzle (the "chair puzzle")
Where: a field west of the Yellow Tower, just south of a radio station — around map coordinates 34, 12. You'll spot a red platform with a chair and a set of headphones hanging above it, with six microphone stands lined up behind.
How it works: the game never explains this one. One player sits in the chair and wears the headphones (real headphones or earbuds make this dramatically easier). The other players spread out between the six microphones. The puzzle only progresses when the listening player identifies the microphone that's actually working.
Players also call this the speaker puzzle. Solution: have players take turns speaking into the microphones, one at a time. The listener waits until they can hear the speaker clearly in both ears — that's the active microphone. Signal it: if you hear the speaker only in your left ear, lift your left hand and the speaker moves right; hear them in both ears and both arms go up. The player at the correct mic presses the button on their stand, the meter in front of the chair fills a step, and the round repeats until the meter is full. Test every microphone before starting so the listener knows what each player sounds like. For the full deep-dive — setup, group tactics and the mistakes that wipe your meter — see the microphone puzzle guide; wearing the headphones yourself? The headphone puzzle guide covers the listener's side.
Easter Egg Hunt (3370, 1490)
Don't start this one at night — with two players it can take a day or more of in-game time. The arena holds 36 wooden puzzle pieces in four types: yellow ones by the trees, green ones on rocks and boulders, red ones around the main red area, and blue ones on top of the nearby rail. Search the whole arena from the start to the rails on the far side — there's a secret orange tunnel in the mountain side, and one green piece sits on a rockface above ground level that you can only reach through it. Use the boulders to climb onto the rails for the blue pieces. Once you've gathered everything, place the pieces on the wheel in any order — the order doesn't matter, just the collection.
Music Room (3200, 1260)
In the beige-and-red striped building in the top-left corner of the map. Head inside and you'll find several yellow speakers at the back, each playing a different sound. On the other side of the speakers are five booths, each with a place to hang one speaker. Near the entrance there's a lockable room with five more booths, each playing a sound that matches one of the speakers outside. The player inside the locked room listens to their speaker and verbally recreates the sound over the intercom — hum it, describe it, do your best impression — so the player outside can find the matching speaker and hang it in the correct booth.
Stage Directions (3410, 1590)
Southeast of the egg hunt and south of the Yellow Tower sits a dark blue-and-black stage. One player is locked inside the booth; the other stands at the panel of buttons near the seating area. Inside the booth, one of seven lights shines on a panel below the window — but the position needs to be inverted for the player outside, like stage directions: the top-left light for the booth player is the top-right button for the outside player. The mapping is 1↔3, 2 stays 2, 4↔7, 5↔6. The booth player inverts the number and signals it by raising their arm once per number — light seven becomes seven arm raises — and the outside player presses the matching button.
Aerial Seat (3570, 1600)
South of the Yellow Tunnel and the Black Tower sits a puzzle with a crescent-moon chair on an aerial track. The starting platform holds the usual nine puzzle pieces, and a button starts the chair running continuously around the track. On the far side, a display board shows five pieces in a sequence — the sequence is static, it never changes. The intended solve: use binoculars to check each piece with your partner, then ferry the correct ones over by chair. The fast way: both of you ride the chair to the far side, grab two pieces each (a backpack lets you carry two), ride back, and place them on the display board next to the black screen. Press the red button underneath once all five are placed.
Button Room (3290, 1670)
East of the Yellow Tower, behind the chairlift station, two grey buildings face each other across a gap — one full of buttons, the other full of lights — with a yellow cage between them for shouting through. When the puzzle activates, one of the lights in the far building shines, and that player must describe its position to the button player. Keep it simple: name each wall (left wall, back wall, the curve, right wall, wall right of the door) and describe the shape of the light configuration — "the first light in the straight line with a couple of extras sticking off it" beats vague pointing. The button player presses the matching red button; a correct press locks it in and the sequence moves on.
Black Tower & the Black Sphere
The Black Tower is the island's final gate — a tall dark monolith in the central island, best spotted from the chairlift, roughly between the Yellow Tower and the island's highest peak. Its door stays shut until all four colored towers (Red, Green, Blue and Yellow) are finished — complete their puzzles and the door opens on its own. Approaching it with your group and operating the trigger together (a spoken 3-2-1-press countdown works) may pull one player into a brief hypnotized vision sequence showing the monolith, a black sphere and a red figure — that's a progression clue, not a puzzle; just wait for it to finish.
The Black Tower asks for six completion pieces (the exact number can vary between sessions — check the tower's live requirement). Any unsolved puzzle on the island can supply them; red and normal pieces work, but save any purple pieces for the post-game green structure near the Map Room. Once six pieces sit in the tower's sockets, you can climb to the roof and grab the Black Key — the key from the opening cutscene. Carry it to the Wall: a huge green gate on the far western side of the island (voice chat distorts near it — that's a transition cue, not a bug). Insert the key, walk through, and head straight for the black sphere. Inside are the final co-op rooms: clear them to a dark red chamber with a suspended mechanism and a button. Press the button, wait for the sphere to power down, follow the red route across the water to the small ending building, wave goodbye at the sign, and enter as a group — credits, and the "Big Goodbye" achievement (first ending). Continue on the same save afterward for the seven purple gourds puzzles and the true ending.
Three of the six Black Tower puzzles disable voice chat — agree on a signal system (gestures, lights, movement) before starting, and know that a wrong input usually resets your progress.
Blue Locked Room Symbol Puzzle
Down and to the left of the Black Tower entrance: a locked room with a set of switches outside and a meter above them. Seven symbols light up at random inside, and the inside player cannot speak. Number the symbols first (1-2-3 across the top, 4-5-6-7 below). When a symbol lights, the inside player signals its number with a countable gesture — symbol 6 becomes six jumps. The outside player presses the matching switch; the meter only rises on a correct press and a wrong press resets the puzzle. Repeat until the meter fills and the collectible drops.
Green Room Red Light Puzzle
From the Black Tower entrance head right and drop down near the two large green-grey pillars: two rooms, one showing the tile pattern and the other where you rebuild it — voice chat is disabled. The rebuilding player places a tile in front of a one-way blackboard; the pattern-viewing player reads the tile's position through it and answers with a red light. Agree the light code first (common: number of flashes = slot number; rapid burst = "tile doesn't belong"). Place each tile, confirm, repeat until both sides match and the reward appears.
Double Green Barn Puzzle
Near the Green Wall — from the Yellow Tower go straight right until you reach the barn, with the collectible waiting out front. One room shows a sequence of physical poses; the other player must recreate them with tiles, again without voice. One player studies the pose sequence, then moves to the narrow chamber on the right and acts each gesture out slowly with the character's body; the teammate watches, matches each pose to the correct tile, and enters the exact order. Order matters — if a gesture is missed, repeat that one rather than restarting. Finishing releases the gourd at the front of the barn.
Golden Mask Obstacle Race
One player wears a golden mask that fully blocks their view; the other guides them through an obstacle course. Voice is allowed here. Put the mask on one player, push them through the starting gate, and call out short single instructions before each obstacle — move, jump, climb, turn — one at a time, letting them react. Red walls can block your line of sight, so keep moving around them to keep eyes on your teammate. At the end the masked player presses the button to complete the run and claim the collectible. (Identical mechanics to the Blue Tower-area Blindfolded Obstacle Course at 3360, 1930 — likely the same structure, usable for either tower.)
Chairlift Shape Sequence
Often called the simplest of the six. One side of the chairlift shows a completed shape sequence; the other side has loose shapes you carry across and arrange the same way. Memorize the pattern first, then ferry the shapes over and place each in the matching position — shape and exact spot. A backpack lets you carry two shapes at once, halving the chairlift trips.
Deep Well
A tall vertical room with the collectible at the very bottom. Go to the bottom and pick it up — grabbing it seals the stairs, so you can't walk back up. Stand close to the edge and throw the collectible up to the first platform; have a teammate waiting there to catch it before it falls back down. Repeat the throw-and-catch up each level, aiming carefully on the higher gaps, until the top — then place the collectible in the designated box to lock it in.
Inside the Black Sphere: 7 Final Co-op Rooms
Past the Wall — the huge gate opened with the Black Key — the black sphere itself holds the game's final gauntlet: a series of co-op rooms that lead to the dark red chamber, the suspended mechanism and the first ending. The six puzzles above earn the Black Key; the rooms inside the sphere are the final stretch of that run.
Player reports describe seven rooms inside — Symbols on the Wall, Blue Totems, Tomato Timer, Race Track, Red Kettle and Switches, Hidden Symbols and Shapes and Switches — all built around two-player teamwork: bring a partner and keep the same communication rhythm you used for the Black Tower's own puzzles (assign roles out loud, and have a gesture code ready in case a room blocks voice chat).
The reported solutions below are the two-player baseline — some rooms shift with three or more players, but the core idea holds. A couple of these rooms muffle or block voice chat, so keep your gesture code ready.
Symbols on the Wall
Two rooms side by side. One player reads the symbol board in their room and calls out the order; the other places the symbols to match. The trick is precision — say "top row, second from the left" rather than just naming the shape.
Blue Totems
One player steps into the opposite room and watches the blue totems for glowing symbols; the other presses the switches on the matching totems. The reliable trick: the observing player stands in front of the glowing totem, so the switch player can see exactly which one to hit.
Tomato Timer
A countdown chase. One player grabs the tomato timer and kicks it across to the other, back and forth, as fast as possible before the time runs out — then place the timer on the pedestal at the end of the room to finish. Keep the kicks short and aimed; a fumbled tomato costs the whole run.
Race Track
Line up side by side at the racing line, run at the same time to the end of the path, and press the two switches together. A spoken 3-2-1-go keeps the timing honest — the switches need to land in the same moment.
Red Kettle & Switches
The player on the left side of the room works the wall switches; the player on the right gets a row of buttons that light up to show which switch to activate. If your voice won't carry, use the room's built-in signal: toss the red kettle up over the wall toward the switch that needs pressing. For the full deep-dive — the glowing-button pattern, the "kettle as a dot" marking method and the second kettle room one floor up — see the kettle puzzle guide.
Hidden Symbols
A classic symbol puzzle with a twist: one player enters the room and can only see the symbol cards through a viewfinder. Read the cards through it, then communicate through the window where each symbol goes on the lineup while the other player places them. This is the room most players mean by the "camera puzzle" — for the full solve, the four-player relay and the other puzzles that share the nickname, see the camera puzzle guide.
Shapes & Switches
Each player gets their own room: one side shows glowing shapes, the other side holds the matching switches. In-game chat is off here, so meet at the window and act the shapes out with your arms — the gesture code you built for the Black Tower's silent rooms is exactly what this one wants.
Reports differ on the gate's exact spot — the north-facing front door of the Black Tower and a huge green gate on the far western side of the island (voice chat distorts near it) are both described by players. Either way the step is the same: insert the Black Key, walk through, and head straight for the black sphere.
Black Tower done? The first ending ("Big Goodbye") waits inside the sphere. The true ending needs all seven purple gourds puzzles plus every puzzle you skipped — and the 15-gourd delivery to the green dome beside the train station. Full chain in the Endings section.
The Heavy Golf Ball Puzzle
What it is: somewhere in the open world you'll find a platform holding what looks like a red ball. Pick it up and you'll immediately notice it's far heavier than it looks — and it can't be thrown or carried far alone.
Solution: this is a relay race. The goal ("Hole In Many") is to move the ball from its tee to the hole by passing it between players — only one person can carry it at a time. The rest of the group moves ahead and gets into position for the next pass, then the carrier tosses it forward. With two players you pass back and forth while shuffling toward the hole; with a bigger group you can spread a proper line along the course. Drop it in the hole and confetti rains dole Gourds puzzle #1.
The Red Coordinates Puzzle (3259, 1883 & 3231, 1976)
A second coordinate puzzle, cousin to the 4166, 1899 puzzle — and this one needs two players working together. You'll find a box (or sign) showing a pair of numbers that change as the box moves — the ring displays two coordinate pairs, one per player.
How it works: two players carry the box between them and walk across the map — toward the far wall, roughly at the map's edge, or take the chairlift if you've activated it (much faster). As you walk, the displayed coordinates tick down toward the target pairs. When the numbers on the box match the two coordinates shown on the ring — 3259, 1883 and 3231, 1976 — you've found the spot: there's a button and a box at each matching location.
Solution: press the two buttons at the same time — one player per button, coordinating over walkie-talkies or megaphones, or with a countdown if you're in earshot. Hold them together and complete the interaction. A GPS tracker item (a light blue box showing your current latitude on top and longitude below) makes this dramatically easier — it sits in the red square structure below the Green Tower near the chairlift station, and it solves both coordinate puzzles outright.
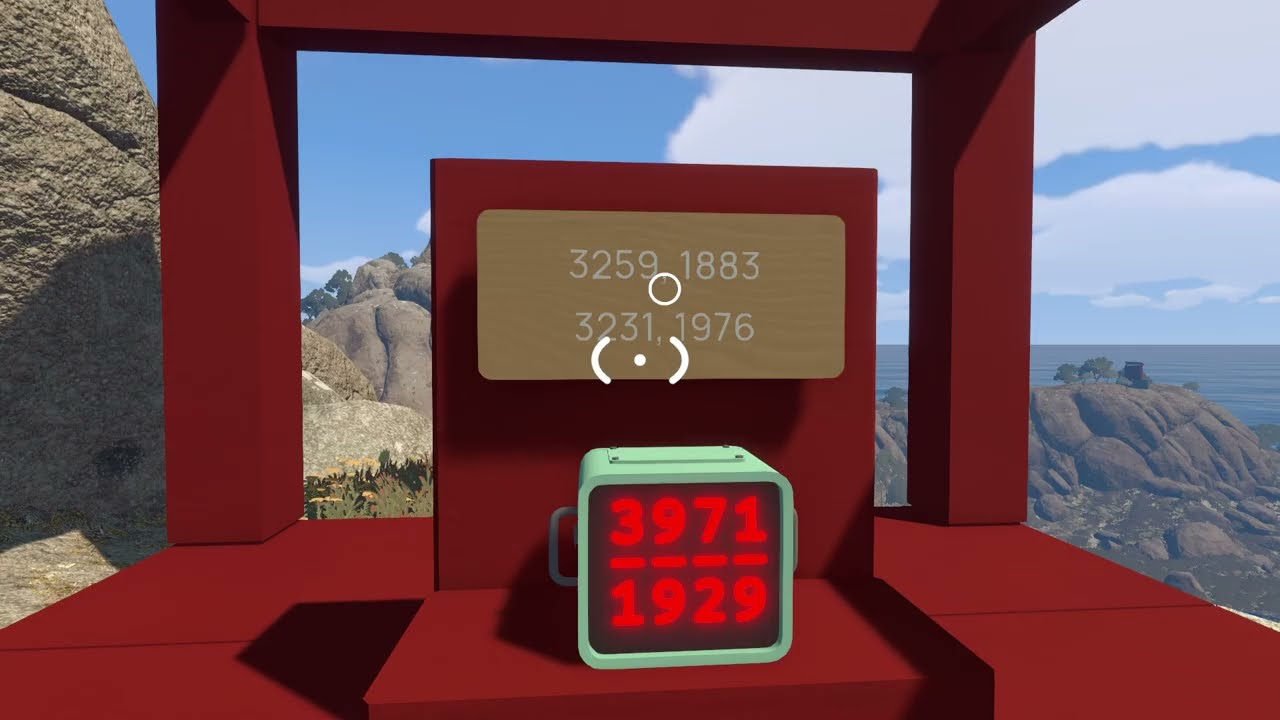
Match the moving coordinates, then press both buttons together.
The Green Flare Puzzle
A hidden-box hunt that has spooked more than a few groups. The green flare fires in the direction of a box hidden near the seaside — and the box is tucked into a small alcove under the rocks, right at the waterfront, where you'd never think to look.
How it works: one player stays at the flare and fires it; the shot points toward the hidden box. Without walkie-talkies, press and hold the flare button, wait for the flare to reset (the green mist descends), and fire again — the repeated shot helps you triangulate. The second player walks along the coastline in the flare's direction until they spot the alcove under the rocks at the water's edge.
Solution: the player who reaches the box grabs it and holds it while the flare fires — the held box yields the red gourd hidden inside. Keep one player on the flare until the gourd is safely out.
The Seaside Counting Binoculars Puzzle
A seaside puzzle room with a countdown timer and a sky-launched board — one of the trickier counting puzzles on the island. It reuses the tube-telescope mechanic from the tower puzzles, but adds arithmetic.
How it works: one player enters the puzzle room and opens the door — the timer starts and a bunch of faces/figure panels light up and flicker across the walls (16 in the demo run; the number varies). Count every face that flashes — when the lights go off, the counting's done. The panels have different shapes with different values: asterisks, triangles and a third shape, worth 1, 5 and 10 (exact values are shown on the panels themselves).
Solution: press the button to launch the board into the sky, then read it through the nearby telescope and input the target number on the tile at the launch spot. If the number can't be entered directly — say it's 19 and the tiles don't add up — you can compose it with addition and subtraction: for 18, enter 20 − 5 + 3 (the tiles' values combine arithmetically). A correct input brings confetti, and the gold drops at the distant telescope area.
The Blue Slope Music Puzzle
A blue house-like structure on a slope beside the "Moon Light" (the big sphere of lights) — one of the most-asked-about puzzles in the Steam community (the "Green platform north of Blue Tower" stuck thread is this exact puzzle). It's a fetch-and-return challenge: the building shows four drawn designs, and you must bring back the matching music blocks from four other puzzle arenas around the island.
How it works: screenshot or memorize the four designs, then travel to each source arena (the trains and chairlift make this much easier): ① a nearby first area; ② a squiggly-panel location you exit by jumping out after completing that puzzle; ③ the body-part pointing puzzle arena (the Mountain Gesture telescopes area); ④ the sound/audio puzzle arena — a lot easier to reach after the main ending once the purple gourds give you fast access, otherwise it's all the way across the map.
Solution: bring all four blocks back to the blue slope house and place them in the matching slots. Do this one last — the fourth block (the sound one) is the painful trip, so save it until you've got the purple-gourd shortcut or the train network running.
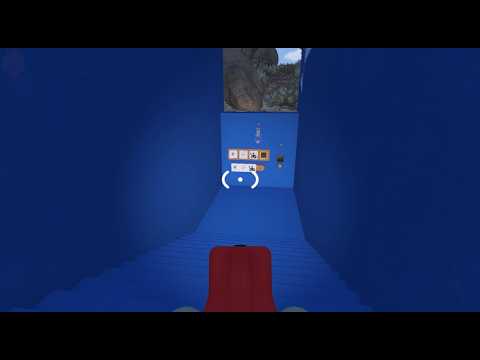
Four designs, four music blocks, one long fetch quest.
The Dome Microphone Puzzle
A red-and-white striped domed building — a different puzzle from the Yellow Tower chair microphone puzzle, and different again from the Green Seat Speaker puzzle down the coast. Players search for the "microphone quest" and find all three; this one is the straightforward one.
How it works: one player sits on the chair with the microphone headset and hears one specific microphone among several. A second player walks to each mic and says "Test. Test." until the sitter hears them super clear — that's the active microphone.
Solution: when the sitter hears the right one, they wave their arms to get the walker's attention; the walker presses that mic's button. The fixture rises, levels up, and yields the reward. Repeat until done.
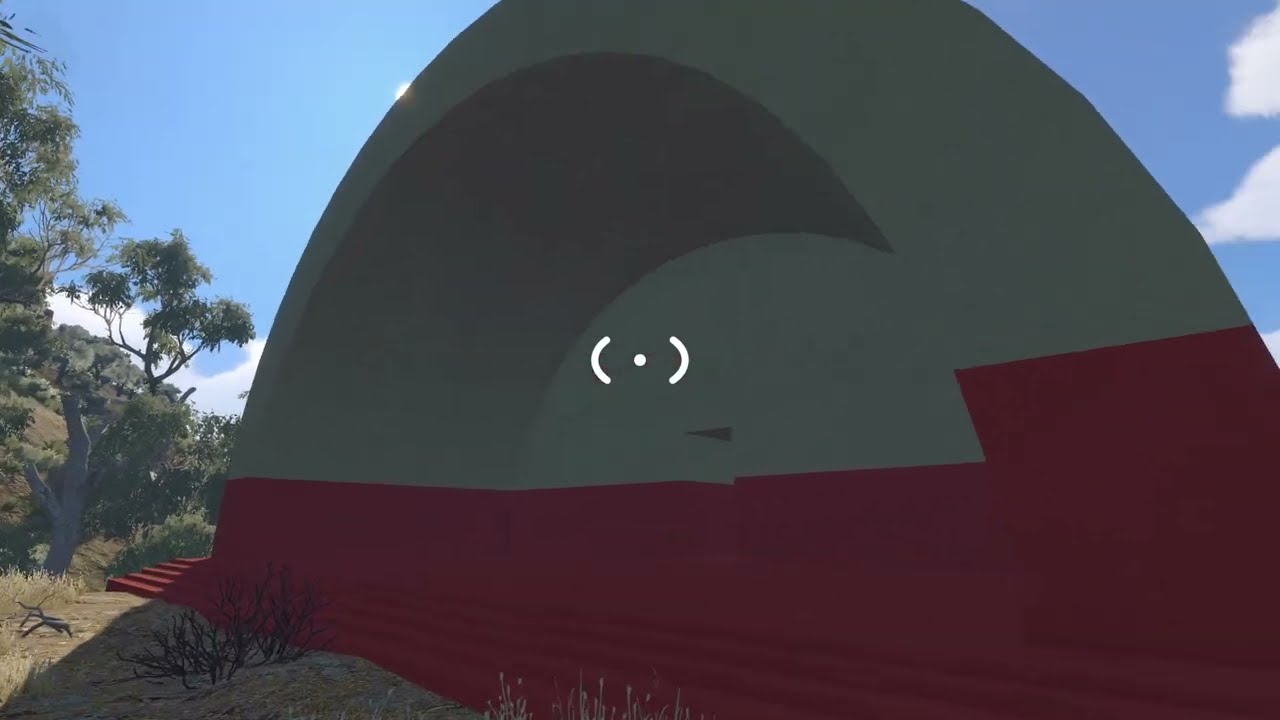
The dome mic puzzle — one of three different microphone puzzles on the island.
The Green Seat Speaker Mic Puzzle
Third of the island's three microphone puzzles — the one that sends one player on a very long walk. A chair next to a music area plays music for the sitter while their friend treks across the map to a hidden radio station; the walk is the puzzle.
How it works: one player sits in the green chair and hears music playing. Another player heads off — past the Blue lighthouse (the Blue Tower), through the tunnels or across the rope bridge, into the green area — toward a hidden radio station in the light-blue music area (map coordinates 3990, 1800, radio on a short blue platform by the rockface). Every radio station has a distinct sound, so the music tells the sitter where their friend should be heading.
Solution: one player must stay in the chair the whole time — the sitter presses the button when the walker calls in ("I'm here, press the button"). The hidden "microphone bits" fixture opens and the walker takes the red finger collectible. Without walkie-talkies, agree on a signal before splitting up — a flare shot or a pre-arranged button rhythm works; otherwise the sitter just keeps pressing and hoping the walker arrived. Do this one in daylight if you can — the walk crosses some of the island's most confusing terrain.
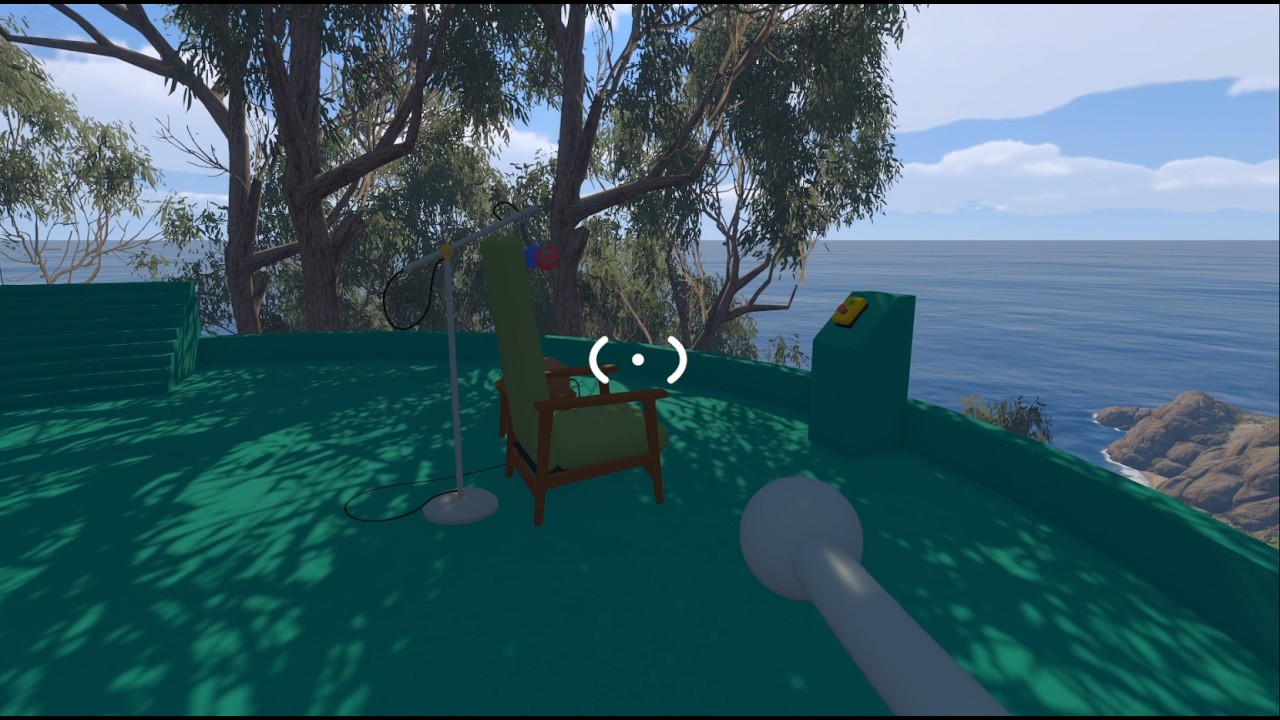
One player in the chair, one player on the long walk.
Purple Gourds Post-Game Puzzles — All 7 Solved
After the true ending, seven purple-tinted puzzle stations appear across the island — the game's post-game challenge set, called the "purple gourds" puzzles after the purple gourds you collect at each one. The solutions below are community-confirmed rather than officially documented — treat them as verified by player testing, and cross-check with your group if anything feels off.
Where to find them: all seven stations sit in the island's south, reachable via the Green Tower chairlift or along the southeast coast. The Wait 30 Minutes House (also called the "Timer") is on the east beach below the Blue Tower; Long-Distance Golf (also called "Golf") starts on the hill east of the Red Tower; Many Lights (also called "Button") sits northeast of the Yellow Tower beside the railway tracks; 9 Speakers (also called "Speaker") is in the far northwest corner; 9 Symbols (also called "Posing") is in the northeast corner; Platforming (also called "Obstacle") is southeast of the Blue Tower; and 36 Drawings (also called "Symbol sign") sits due east of the Blue Tower.
1. Wait 30 Minutes House
What it is: the post-game version of the Timer Room — the door locks behind you and a 30-minute countdown starts on the wall, which is why it's often called the "Timer" puzzle. Solution: there is no trick; wait the full 30 minutes for the door to open. Plan the wait in advance and don't leave the room.
2. Long-Distance Golf
What it is: a golf-ball relay that spans half the island (also called "Golf"). Solution: find the red-zone golf ball and drive it to the mid-section mountain road, ride the chairlift across to the east coast, and pass the ball in a chain — it cannot be thrown, only handed off. If the ball falls onto the tracks, it loops for a full 10-minute cycle before coming back; recover it on the next pass rather than chasing it.
3. 36 Drawings
What it is: sorting 36 drawings into two piles (also called the "Symbol sign" puzzle). Solution: split them into "definite" and "maybe" by inspecting each drawing's fill and petal count — the distinction is visual, so go slow and compare similar drawings side by side.
4. 9 Speakers
What it is: a 3×3 grid of speakers, solved while the group is muted (also called "Speaker"). Solution: the listener memorizes each speaker's sound, then signals with hand gestures which speaker to activate — one at a time — until all nine are confirmed.
5. 9 Symbols
What it is: the image-based twin of the 9 Speakers puzzle (also called "Posing"). Solution: the same silent-coordination approach — signal which symbol on the 3×3 grid to press using a pre-agreed gesture code. The code uses easily posed shapes like a spiral, a snowman and a lowercase e, so the signer can mime each symbol unambiguously.
6. Platforming
What it is: a timed platforming climb (also called the "Obstacle" course) — the countdown starts at the course's starting point, so the timer is already running before the first jump. Solution: throw the timer item as soon as you grab it (it keeps running in your hands), stack players to reach high ledges, and jump the zig-zag sections rather than walking them — and never send two players up the same ladder at once.
7. Many Lights
What it is: a flashing-light code puzzle (also called "Button") — a lightbulb question-and-answer protocol. Solution: one flash means "yes", two flashes mean "no", and a rapid flash means the attempt failed — start over. Work through it in rounds of locate → group → test one-by-one, repeating for five rounds to finish.
All 7 Radio Stations
Seven radio stations are scattered across the island, each broadcasting a distinct sound — and they're landmarks for several puzzles (the Green Seat Speaker puzzle's hidden station is one of them). Activating all seven is a collection challenge in its own right, and the handheld radio you need to pick up broadcasts come from the first one.
| Station | Where | Map coordinates |
|---|---|---|
| #1 Red Music Area — also gives the Handheld Radio | Top of the red area, first music resting area after the crosswalk; radio overlooking the ocean, handheld radio beside it | 3700, 1190 |
| #2 Purple Music Area | Far south; via chairlift, then a short walk downhill | 4250, 2020 |
| #3 Light Green Music Area | Forest down the path from the pass-the-ball (heavy ball) puzzle in the Red Tower area | 3820, 1620 |
| #4 Yellow Music Area | Down the mountainside from the Blue Tower; radio at the back of the arena by a wall with window cutouts | 3310, 1850 |
| #5 Secret Underground Station | Requires the Yellow Tower key — unlock the tunnels at 3500, 1620, take the grey/black path into the dark room; the final radio is a DJ booth with pressable lights | 3500, 1620 |
| #6 Blue Music Area | Light-blue platforms northwest of the Green Tower; radio on a short blue platform with stairs, tucked by the rockface | 3990, 1800 |
| #7 Pink Music Area | West of the Yellow Tower; pink grid structure, radio near the back | 3310, 1280 |
Radio transmitters and receivers pair up for long-distance communication: transmitters sit outside the Map Room near the red flare, on top of the Red/Blue/Green/Yellow towers, in the back carriage of all three trains, and on top of the central mountain. Press and hold the mic button to transmit; receivers broadcast globally. Tower transmitters pair with binoculars, and the tower tops carry laser pointers (three live in the Map Room).
Common Puzzle Mechanics
These aren't single puzzles — they're the recurring systems behind many stations across the island. Understand them once and most machines start making sense.
Key Cutting
Keys in Big Walk are physical, multi-stage objects. You don't find a finished key — you build it.
How it works: a locksmith-style machine cuts a key blank, then an arrow on the key tells you which station to visit next. Each station stamps a new notch, and you carry the growing key around the island until it's fully cut. One-time keys are consumed when used; others persist.
Approach: this is the game's great group-trek puzzle. Send the key with the player who knows the route, keep a walkie-talkie pair active between the key-carrier and the group, and don't panic when a station "rejects" the key — you've likely skipped an earlier stamping station. Retrace the arrow order.
Soundproof Glass
Big Walk's cruelest and best puzzle device: a barrier that completely blocks voice chat, while remaining visually transparent.
How it works: one player is locked behind soundproof glass with information the rest of the group needs — a symbol, a sequence, a switch position. The others can see them but cannot hear them. Text chat dies too.
Approach: everything becomes physical. Pointing, gesturing, holding objects up to the glass, and exaggerated body language are the only channels. If the isolated player can see the panel, let them guide the group by mime; if the group can see it, the isolated player follows gestures. Some groups set up a "relay" — a player mid-distance who can see the mime and shout the interpretation to the others. This puzzle type is why the game warns against external chat: a Discord call would simply delete it.
Practical Island Info
Notes that apply everywhere on the island, whatever you're solving.
Group Size Scaling
Big Walk's host picks a 2-player, 3-player or 4+ player world, and puzzles genuinely adapt. With more players, some puzzles need more hands on more buttons; others become more chaotic — the designers explicitly describe 12-player sessions as "a fun, chaotic mess".
What this means for solutions: a puzzle that took your duo 20 minutes might take a four-player group 5 — or vice versa, if the version demands coordination across more people. If a solution that worked in one session fails in another, the world version is probably different. Check which player count the host chose before assuming you've forgotten the solution.
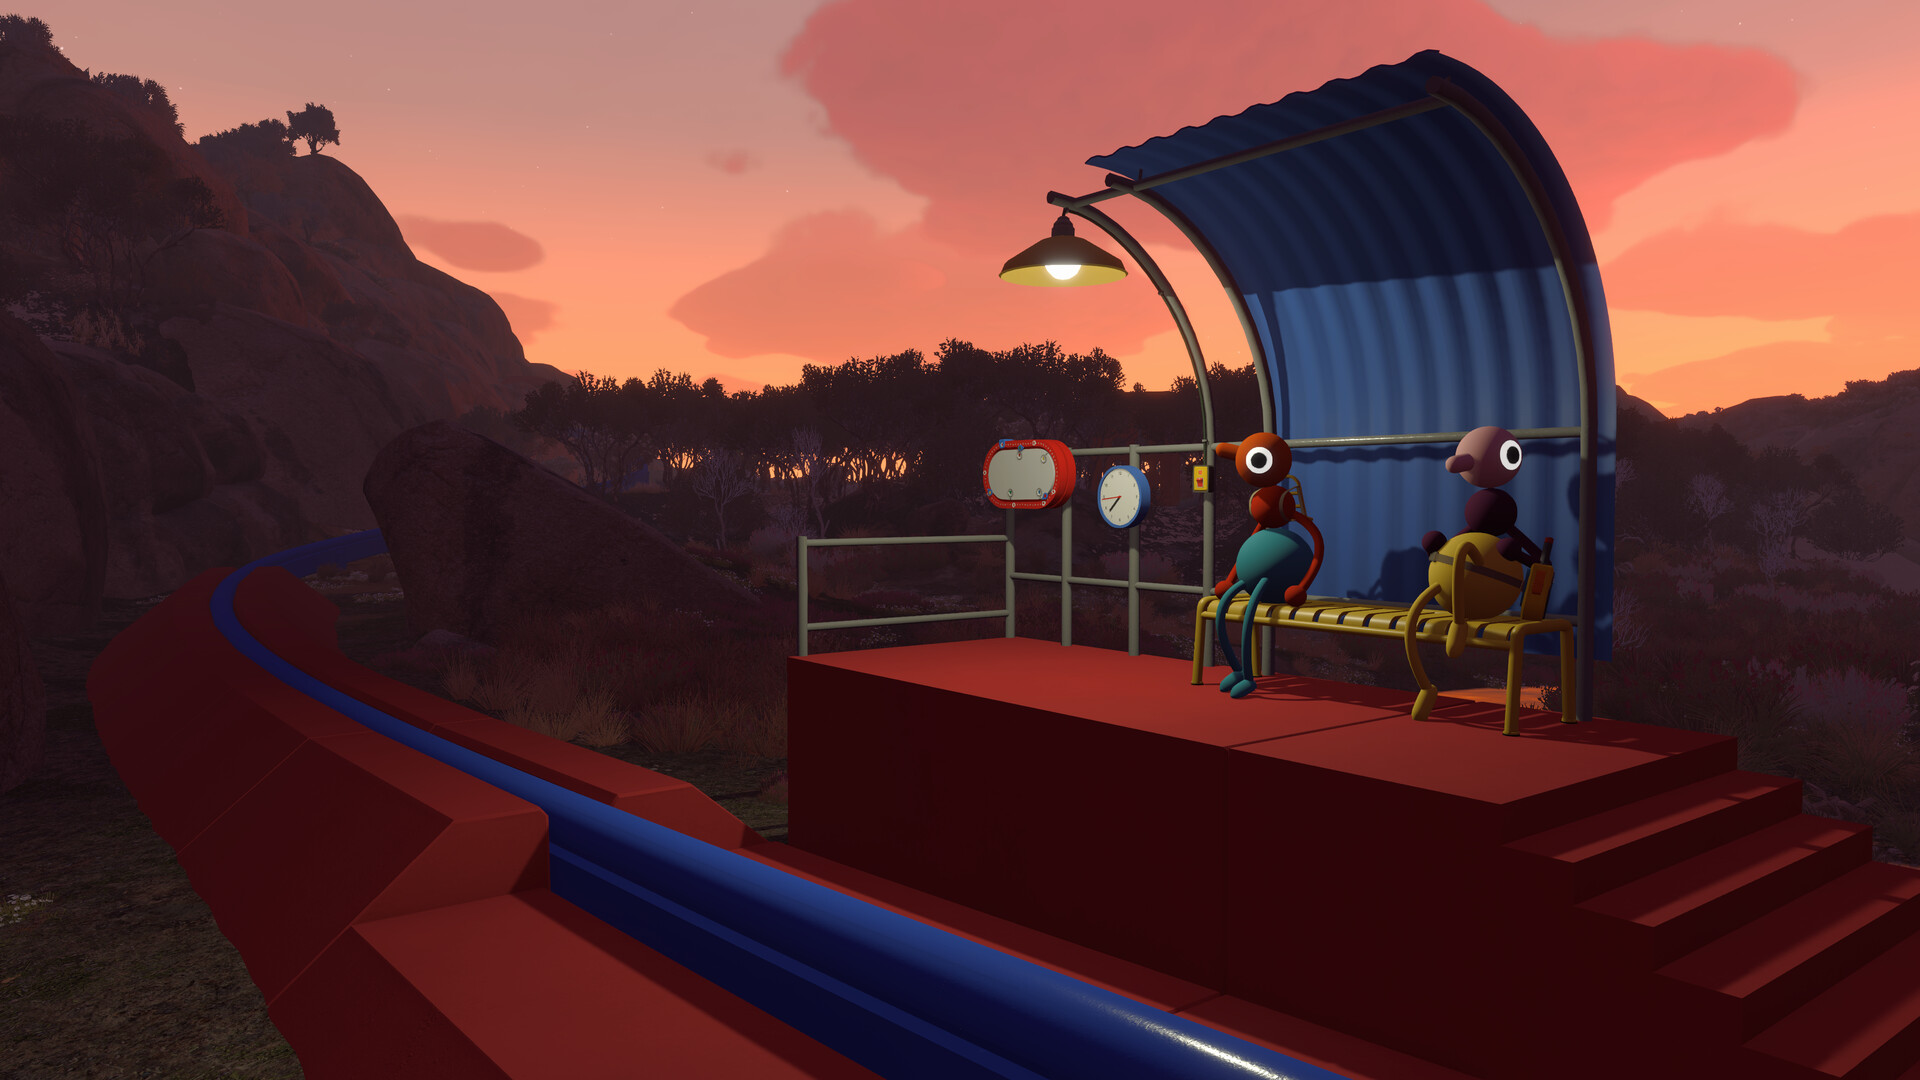
The tutorial teaches the island's puzzle alphabet.
Lost an Item? Check the Lost & Found
Dropped a walkie-talkie in a lake, or had an item vanish when a friend disconnected? Lost objects don't stay lost. Anything you drop — or that despawns with a leaving player — collects in the Lost & Found, a small building near the starting area. Before you re-trek across the island hunting a dropped tool, send one player back to check the hub. It's the island's safety net, and it has saved many groups a very long walk.
The Approach Playbook
When your group hits a wall, run this checklist:
- Read the machine for one minute in silence. Buttons, slots, printed symbols — the solution is usually on display.
- Ask "what's missing?" An empty slot wants a gourd; a blank key wants a stamping station; a closed gate wants a button. Hunt for the missing piece.
- Split with a plan. Send one scout with a walkie-talkie while the group waits at the machine — one scout beats five wanderers. For communication puzzles, switch to hand signals, mime or a relay player.
We're walking the island daily and verifying each puzzle as the community maps it. If a particular puzzle is blocking your group, email support@big-walk.net and we'll prioritize documenting it.
Related Guides
Test your group's skills
Big Walk is out now on Steam, Mac App Store, PlayStation 5 and Switch 2 with crossplay. The island is waiting.